
It’s So Exciting to Discover a Beautiful New Fruit!
I don’t know if you’ve seen these pineberries in your markets, but I’ve occasionally seen them around for a year or so and I finally couldn’t resist trying them out. They are a hybrid of regular Florida strawberries and Japanese white strawberries. As you can see, they have a pure white color on the inside and develop a pink blush on the outside when they ripen. But it is the bright red seeds that really got my attention. I mean, how beautiful are these???
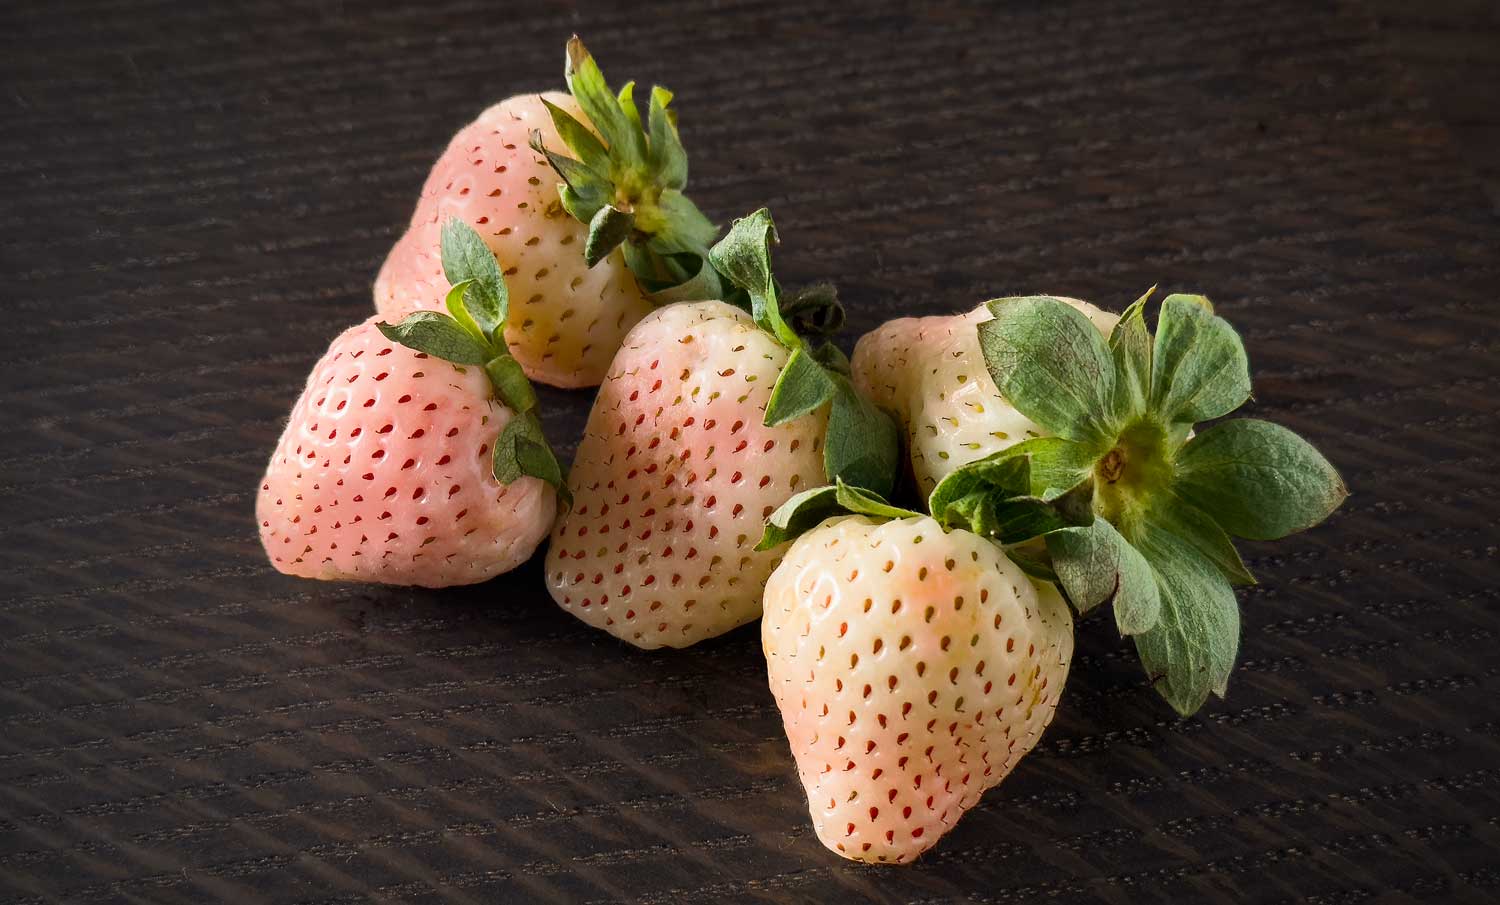
As to their taste, well, the reason they’ve been named pineberries is because their flavor is a cross between strawberries and pineapple. It’s an amazingly delicate and interesting combination. I bought 2 cartons, brought them home and then gave a lot of thought as to what to do with them. They’re really delicious eaten out of hand, but I wanted to showcase their beauty in a tart.
I found a couple of recipes for a pineberry tart, but the fillings didn’t interest me. I thought the pineapple flavor should be emphasized and that’s when I decided to make a pineapple curd filling. I didn’t want it to be fussy, but wanted plenty of pineapple flavor. So, I cooked down some canned pineapple juice until it was thick and syrupy. When I tasted it I realized I wanted some citrus in it, so I juiced a blood orange and added the juice to the pineapple syrup. Then it was only a matter of adding eggs, egg yolks, sugar, and cornstarch to the pan, cooking it over medium heat until it fully thickened and then stirring in unsalted butter.
I don’t recommend using fresh pineapple juice as it contains an enzyme that can prevent proper thickening of the curd. This is supposedly deactivated by cooking, but I didn’t want to take any chances and opted for unsweetened canned pineapple juice.
Before making the curd I whipped together David Lebovitz’s recipe for French Tart Dough . I’ve talked about this recipe many times because I like it so much for tarts. It’s unusual in that butter, sugar, water, and salt are first stirred together in an ovenproof bowl, placed in the oven, and heated until the butter starts browning along the sides of the bowl. You then remove it from the oven, dump in flour, stir it together, and press it into a tart shell. It then goes straight into the oven. No pie weights are required, no chilling, etc. because it doesn’t shrink and you end up with a lovely and delicious tart crust. Talk about easy!
David mentions that the lady who taught him this recipe always presses the dough up against the sides of the tart pan with the tines of a fork. He said he found this to be unnecessary. I’ve done it both ways and think it helps immensely to press it with a fork. I have almost no shrinkage when pressing it with a fork, whereas it did shrink when omitting this step.
But I’ve gotta mention what happened to me this time around. I have always used the same tart tin when making this crust – a 9 inch pan with 1 inch high sides and a removable bottom. For whatever reason, I grabbed a different pan this time. The dimensions are almost the same, but the sides are 1 1/8 inches high, rather than only 1 inch. Well, as I was pressing it in I noticed that the bottom of the crust seemed thinner than normal, but just went with it. David instructs you to reserve a raspberry size piece of dough to use for patching up any tiny cracks that should appear after baking. I’ve never had to use more than half of this tiny reserved piece of dough.
Well, when this crust came out of the oven I could not believe my eyes. This crust did not have any tiny cracks. It had major fissures. It had split wide open in multiple areas. After staring at it in disbelief and assessing what I did differently, the only answer was the size of the pan. So, take 2. I got out the pan I normally use, made the dough again and it came out perfectly. The extra height of the sides of the first pan had caused the dough to be patted too thinly. Hence, the fail. Lesson learned.

I filled the cooled crust with the curd, covered it in plastic wrap and let it chill for a couple of hours before slicing the pineberries in half and layering them on top. I had originally thought I would decorate it with some whipped cream rosettes or something of that nature, but after I’d placed all the berries on top, I decided that I only wanted some small mint leaves for garnish. I thought the berries were so lovely they didn’t need any enhancement. I’d rather keep it simple and let the berries do the talking. I ended up not needing the full 2 cartons of berries for the tart, so I just nibbled on the remainders.
The curd ended up being a not-too-sweet filling which allowed the flavor of the berries to shine. I don’t think I could have been more pleased. Wouldn’t this be a pretty dessert for Valentine’s Day? Or when I think about it, any other day?


Pineberry Tart with Pineapple Curd
Pineapple curd, flavored with blood orange juice, fills a buttery tart shell, which is then topped with gorgeous pineberries. Just look at those beautiful berries whose flavor is a cross between regular strawberries and pineapple. What a luscious dessert.
8
servingsKeep the screen of your device on
Ingredients
1 recipe French Tart Crust by David Lebovitz
1 1/2 cups (12 ounces) canned pineapple juice
1 1/2 tablespoons blood orange juice
3 large egg yolks
3 large eggs
150 grams (3/4 cup) granulated sugar
8 grams (1 tablespoon) cornstarch
1 stick (4 ounces) unsalted butter, cut into 8 pieces, at room temperature
2 10 ounce cartons pineberries, cleaned, hulled and sliced in half lengthwise
10-12 small fresh mint leaves for garnish
Directions
- Pour pineapple juice into a medium saucepan and cook over medium high heat to reduce it to 6 tablespoons, reducing the heat near the end so that it doesn’t burn. This will take about 15-20 minutes. Remove from the heat and stir in the blood orange juice. Set aside and allow to cool while you prepare the other ingredients.
- Whisk together the eggs and egg yolks in a small bowl. Whisk in the sugar and cornstarch. Whisk all of this into the pan with the cooled juices. Place the pan back over medium heat and cook, constantly whisking until the mixture thickens and you see the first bubble appear. Continue whisking for 1 minute and remove from the heat.
- Press the curd through a fine meshed sieve into a medium bowl. Let cool for 5 minutes. Using a rubber spatula, stir in the butter, a couple of pieces at a time, until fully incorporated.
- Pour the curd into the fully cooled tart shell. Cover with plastic which touches the curd (in order to prevent a skin from forming). Place in the refrigerator until fully chilled - at least 2 hours. This can be made the day before at this point.
- Arrange the pineberries in a circular pattern on top of the tart and garnish with the mint leaves. You won’t need to use all the berries. Keep the tart refrigerated, but it will taste better if left to sit at room temperature for 30 minutes before serving. Enjoy!